

How to Clear System Data on iPhone

Is your iPhone gasping for storage space? Bloated system data may be the culprit — a storage black hole that devours your phone’s capacity.
Unlike managing apps or photos, dealing with system data is like chasing shadows. It accumulates silently, slowing down your device without a clear solution in sight. But worry not, we have some helpful tips that may arm you with the tools to declutter and restore your iPhone’s lost vitality.
What’s iPhone’s system data?
System data on an iPhone is like hidden machinery behind the scenes. It’s not the apps you use or the photos you take, but the background stuff that helps your device run smoothly. Think of it as the gears that keep the clock ticking. This data includes system files, logs, and caches. They’re necessary, but they can build up over time, taking up storage and making your phone slower. It’s not easy to clean up, but we’ve got tricks to help you tackle it.
How to check storage usage on iPhone
Here’s a brief guide on how to check your iPhone’s storage usage:
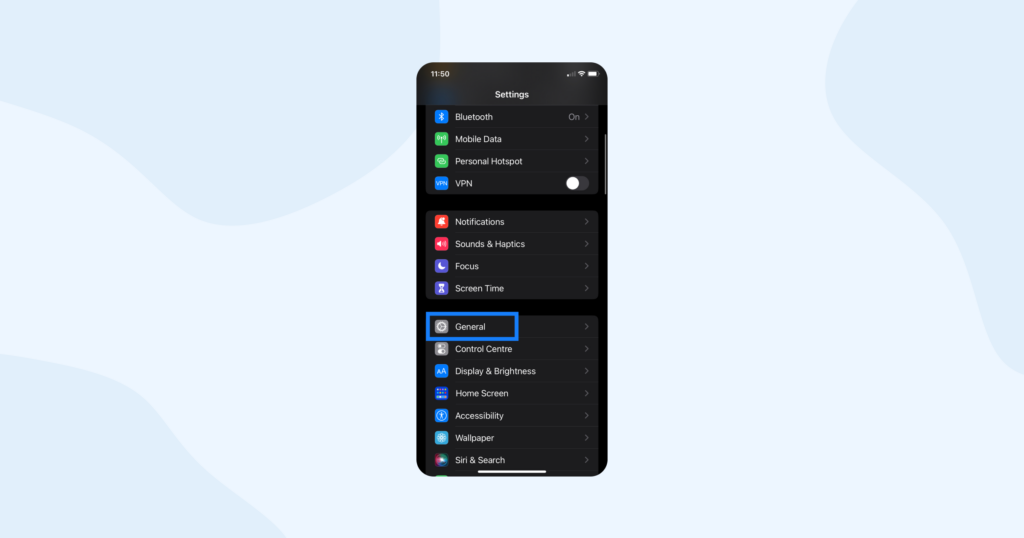
1. Launch the Settings app on your iPhone.
2. Tap on General.
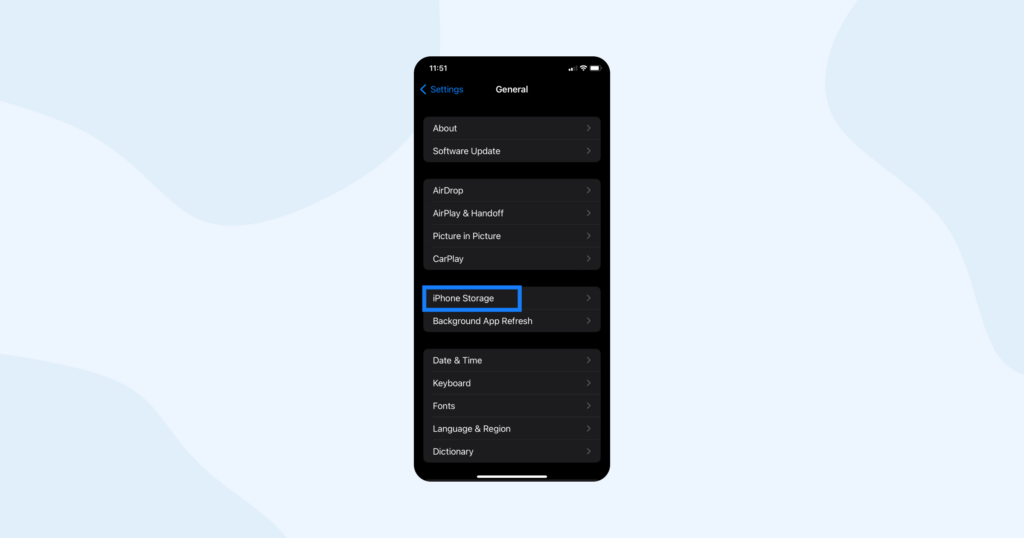
3. Next, tap on iPhone Storage.
At the top, you’ll see a graphical representation of your storage usage.
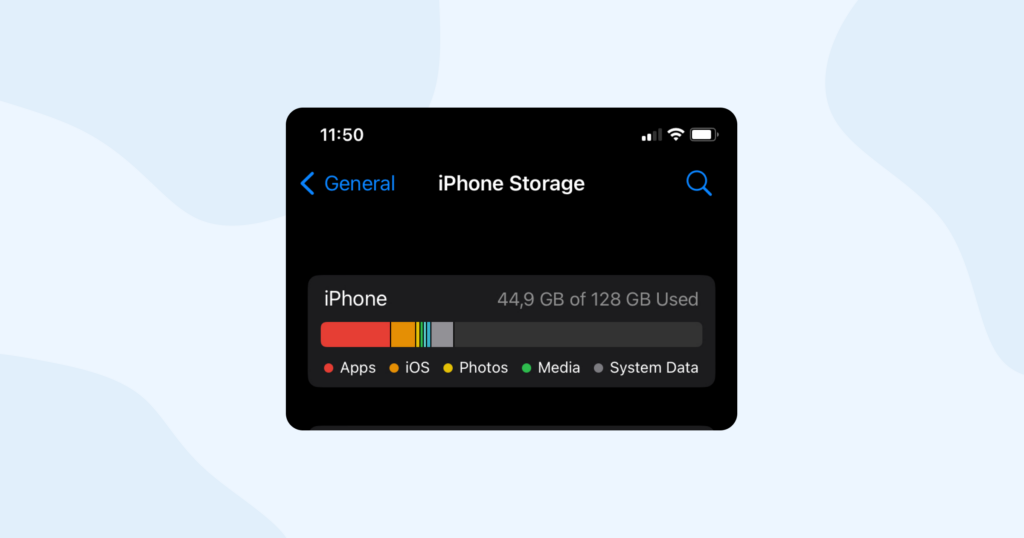
Below the graph, there’s a list of apps displaying their individual storage usage.
4. Tap on each app to view its size and related file consumption. You’ll also find options to offload the app and delete its data if needed.
5. Scroll down to the bottom of the list to find listings for iOS and System Data.
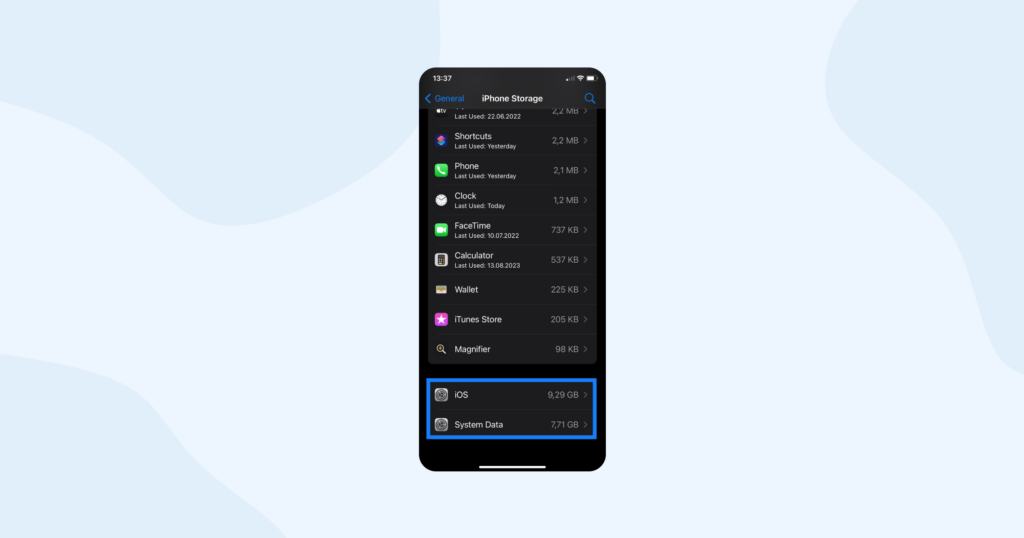
Within the iOS landscape, system data remains somewhat cryptic, described as a collection of “caches, logs, and other resources currently in use by the system.” However, this definition leaves a trail of questions, not detailing the specific contents. Picture it as a medley of various logs, transient data repositories, and miscellaneous fragments that defy easy categorization within the apps listed.
Adding to the intrigue, certain elements are put to work by iOS without being claimed by any particular app. Take, for instance, downloading different Siri voices or installing fonts. These actions can lead to the expansion of this data section. But here’s the twist — they don’t pledge allegiance to a single app or the core operating system itself.
Why is system data taking up all the storage on my iPhone?
This data changes based on system needs, including temporary data written and removed by iOS. However, the challenge is that you can’t view the specific types of data in this category or delete them.
Initially, ‘other system data’ might take up a few gigabytes and can fluctuate with your iPhone usage. The issue arises when this data keeps growing over time. Some users might find their iPhone’s system data occupying a substantial amount of space, even tens of gigabytes.
For instance, in the case mentioned, ‘other system data’ grew to almost 85 gigabytes, devouring available storage and causing device problems. Though the exact cause is unclear, it’s likely due to continuous additions to caches or logs, without effective deletions to match the writing pace. Over time, this can become overwhelming.
Sadly, since pinpointing the exact cause or selectively removing problematic System Data is unavailable, users are left with limited solutions at their disposal.
How to cut down on system data usage
Want to trim down your system data usage? Here’s how:
1. Regular app cleanup. Uninstall apps you don’t use. Apps contribute to system data buildup. Removing unnecessary ones can help.
2. Update apps. Keep your apps up to date. Developers often release updates that improve efficiency and storage usage.
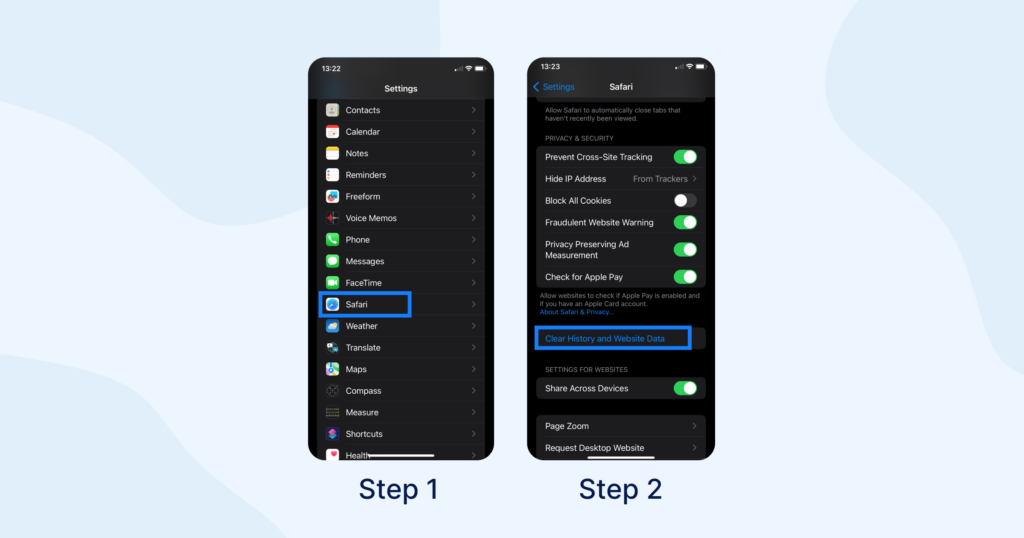
3. Manage Safari data. Clear browsing history, cookies, and cache regularly in Safari settings to free up space.
Limit background app refresh. Go to Settings > General > Background App Refresh, and turn it off for apps that don’t need constant updates.
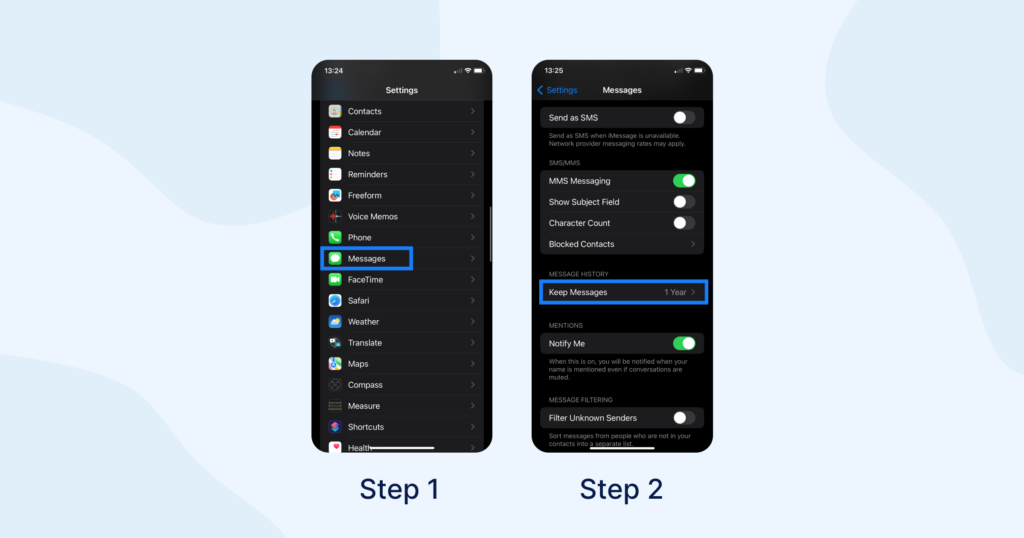
Messages. Open Settings, then tap Messages, scroll down to Message History, and change how long you “Keep Messages” from “Forever” to a lower figure such as one year or 30 days.
Avoid full mail downloads. Set mail to download only recent attachments. This reduces mail-related storage.
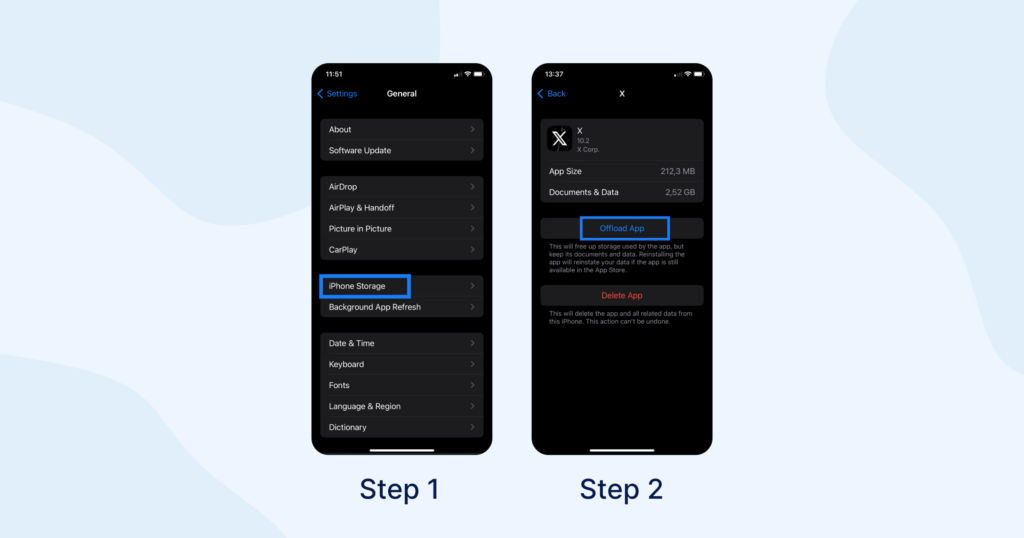
Offload apps. When you offload an app on an iPhone, the app itself is removed from your device, but its data and documents are retained. This means the app icon disappears from your home screen, and the app’s storage space is freed up. However, any associated data like settings, preferences, and user-generated content (such as saved files or game progress) are preserved.
Enable this in Settings > General > iPhone Storage > Offload Unused Apps.
iOS updates. Keep your device updated. Newer iOS versions often optimize storage usage.
Reset settings. In Settings > General > Reset > Reset All Settings. This won’t erase data but can fix system data issues.
Factory reset (last resort). If system data becomes excessively large, back up your data and perform a factory reset to start fresh.
Extra tip: how to clear Android system data
If you’re an Android user, you might be grappling with a similar issue concerning Android system files using up excessive storage. Just like with Apple devices, the accumulation of system data occurs due to numerous apps storing temporary files. Fortunately, Android simplifies the process of tidying up these files, labeling them as “Junk Files.”
Here’s how you can clear out these junk files on Android and free up some valuable space:
- Open the Files by Google app on your Android device.
- Tap on “Clean” at the bottom.
- Locate the “Junk files” card and tap on “Clean xx MB.”
- Confirm your action by tapping “Clear” on the dialog box.
The Files by Google app also provides an avenue to review all the files and attachments stored on your device. Sometimes, these files can eat up a significant chunk of storage. Take a stroll through the app, and if you find any files you no longer need, go ahead and clear them out. Remember that files deleted through the Files by Google app are unrecoverable. If you’re uncertain about whether a file is essential for your device’s functionality, it’s safer to leave it untouched.
If you’re up for a big cleanup, check out this guide on how to clear your Instagram cache.


